
This article will guide you through the new file manager feature in the Family Law Software cloud app. By the end, you'll know how to manage and share client files more efficiently.
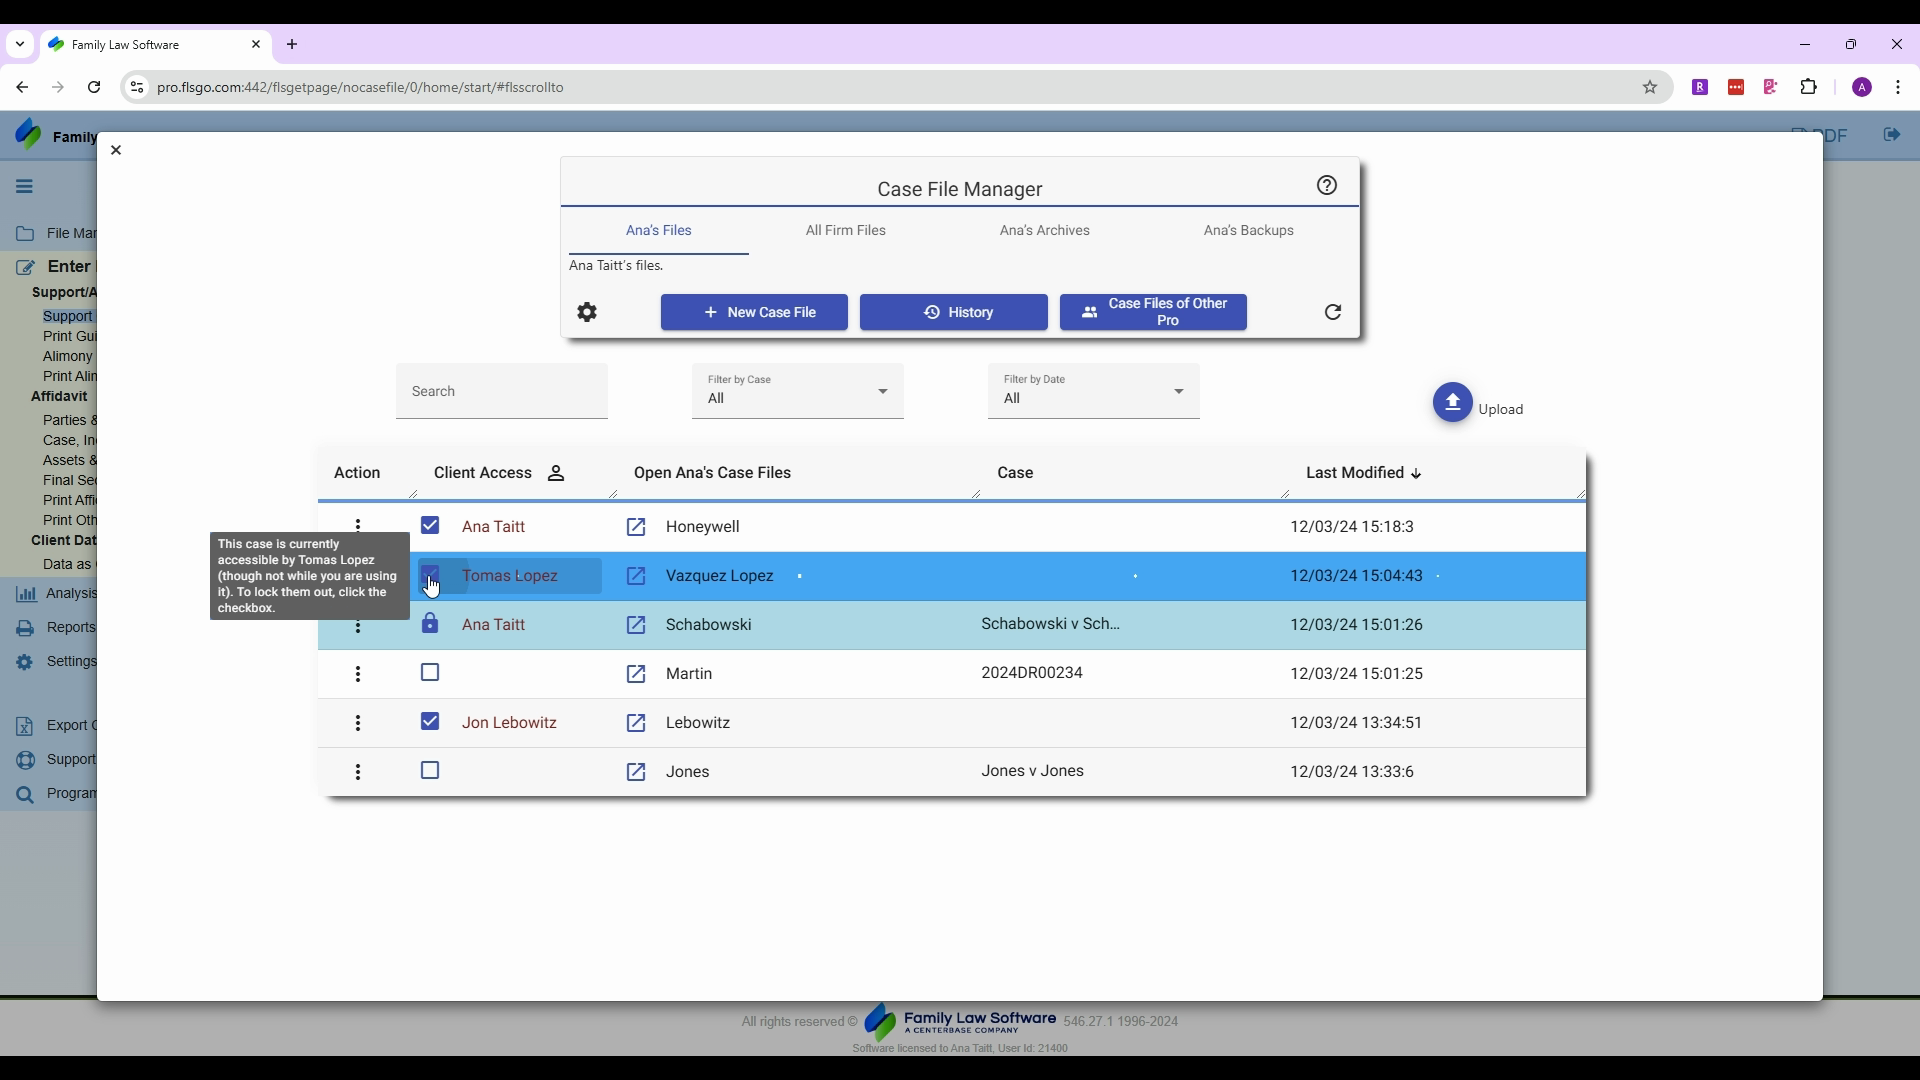
Step 1: Open the new file manager in the cloud app. You'll notice there's no longer a heading for shared files, as any file can now be shared at any time. You'll still see all your clients listed, including past shared files. If you're not using client data entry, all your files will have a blank box next to them, indicating that only you and your firm's users have access to the file.
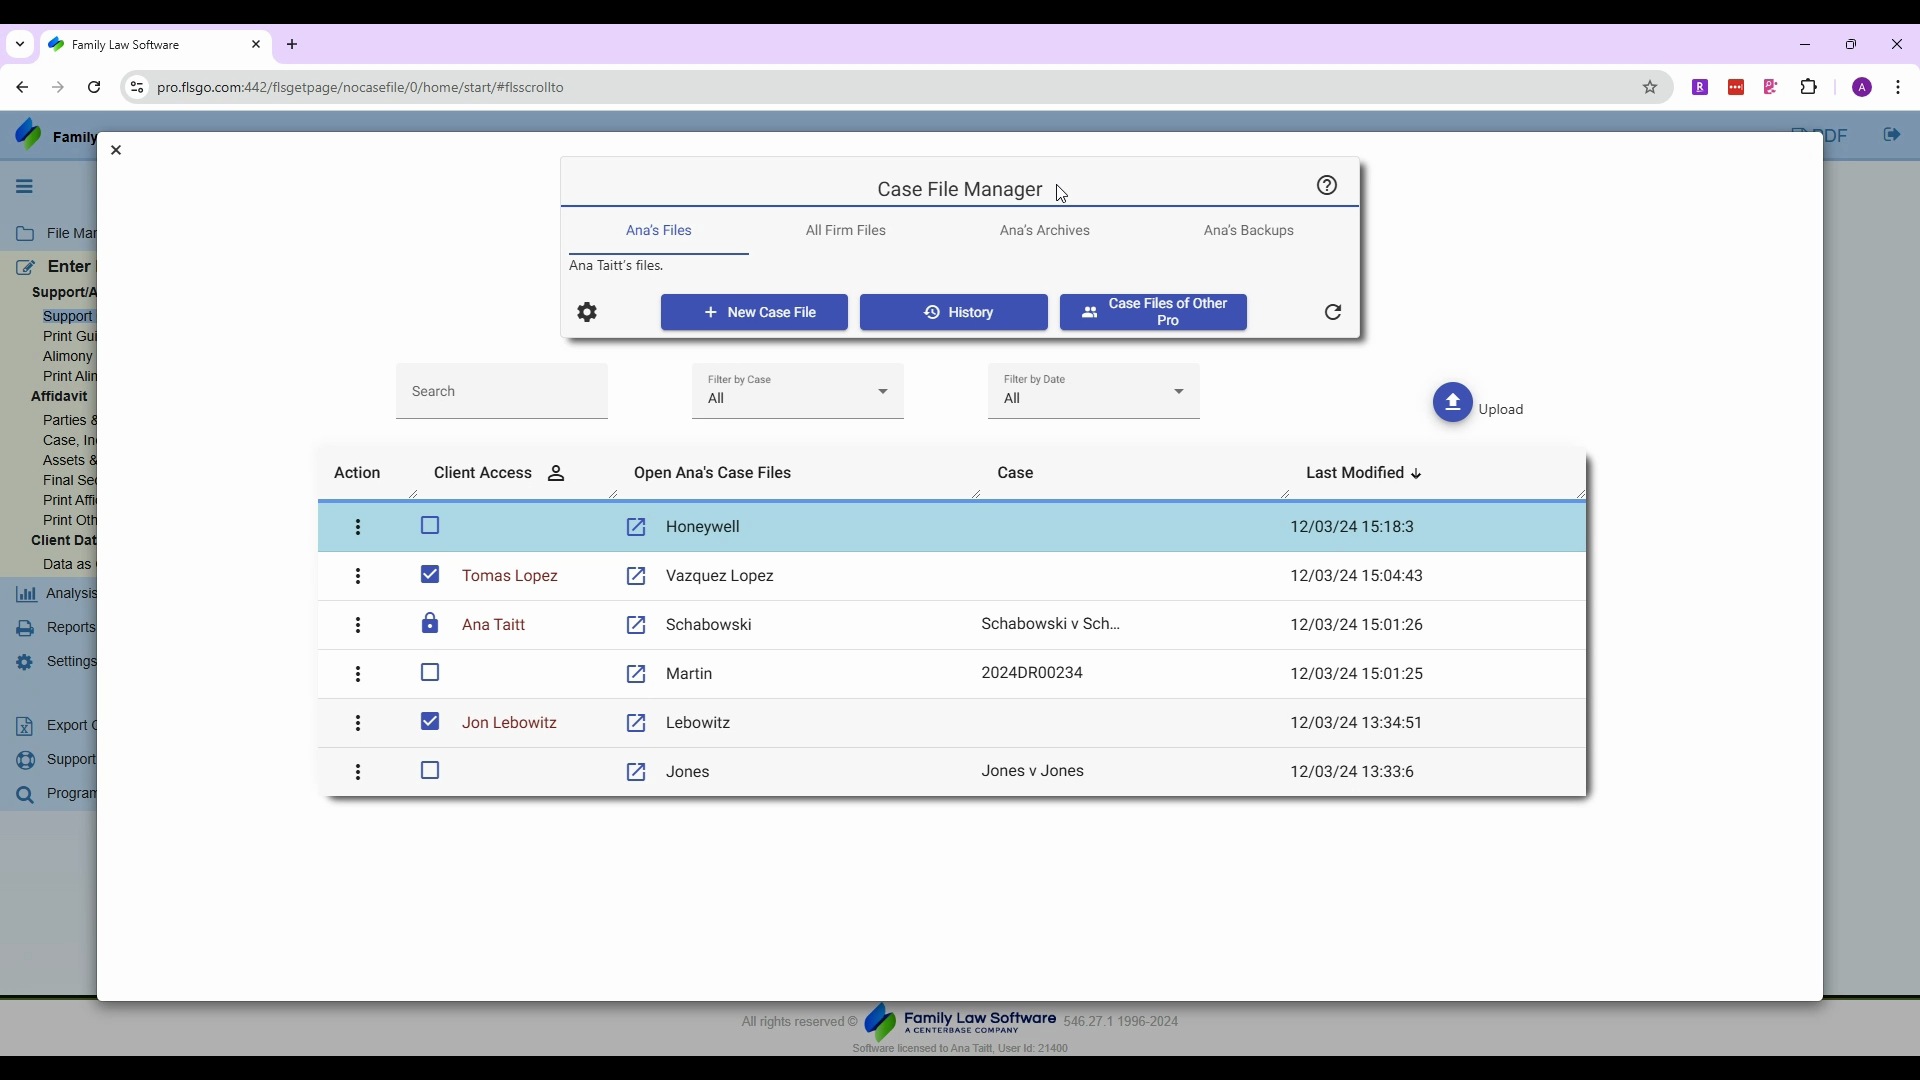
Step 2: If you've registered a client for client data entry, you'll see a check in the box next to the file and the name of the person who has access. A lock symbol means the client has access but you've locked them out. Only you and your firm's users can access this file.
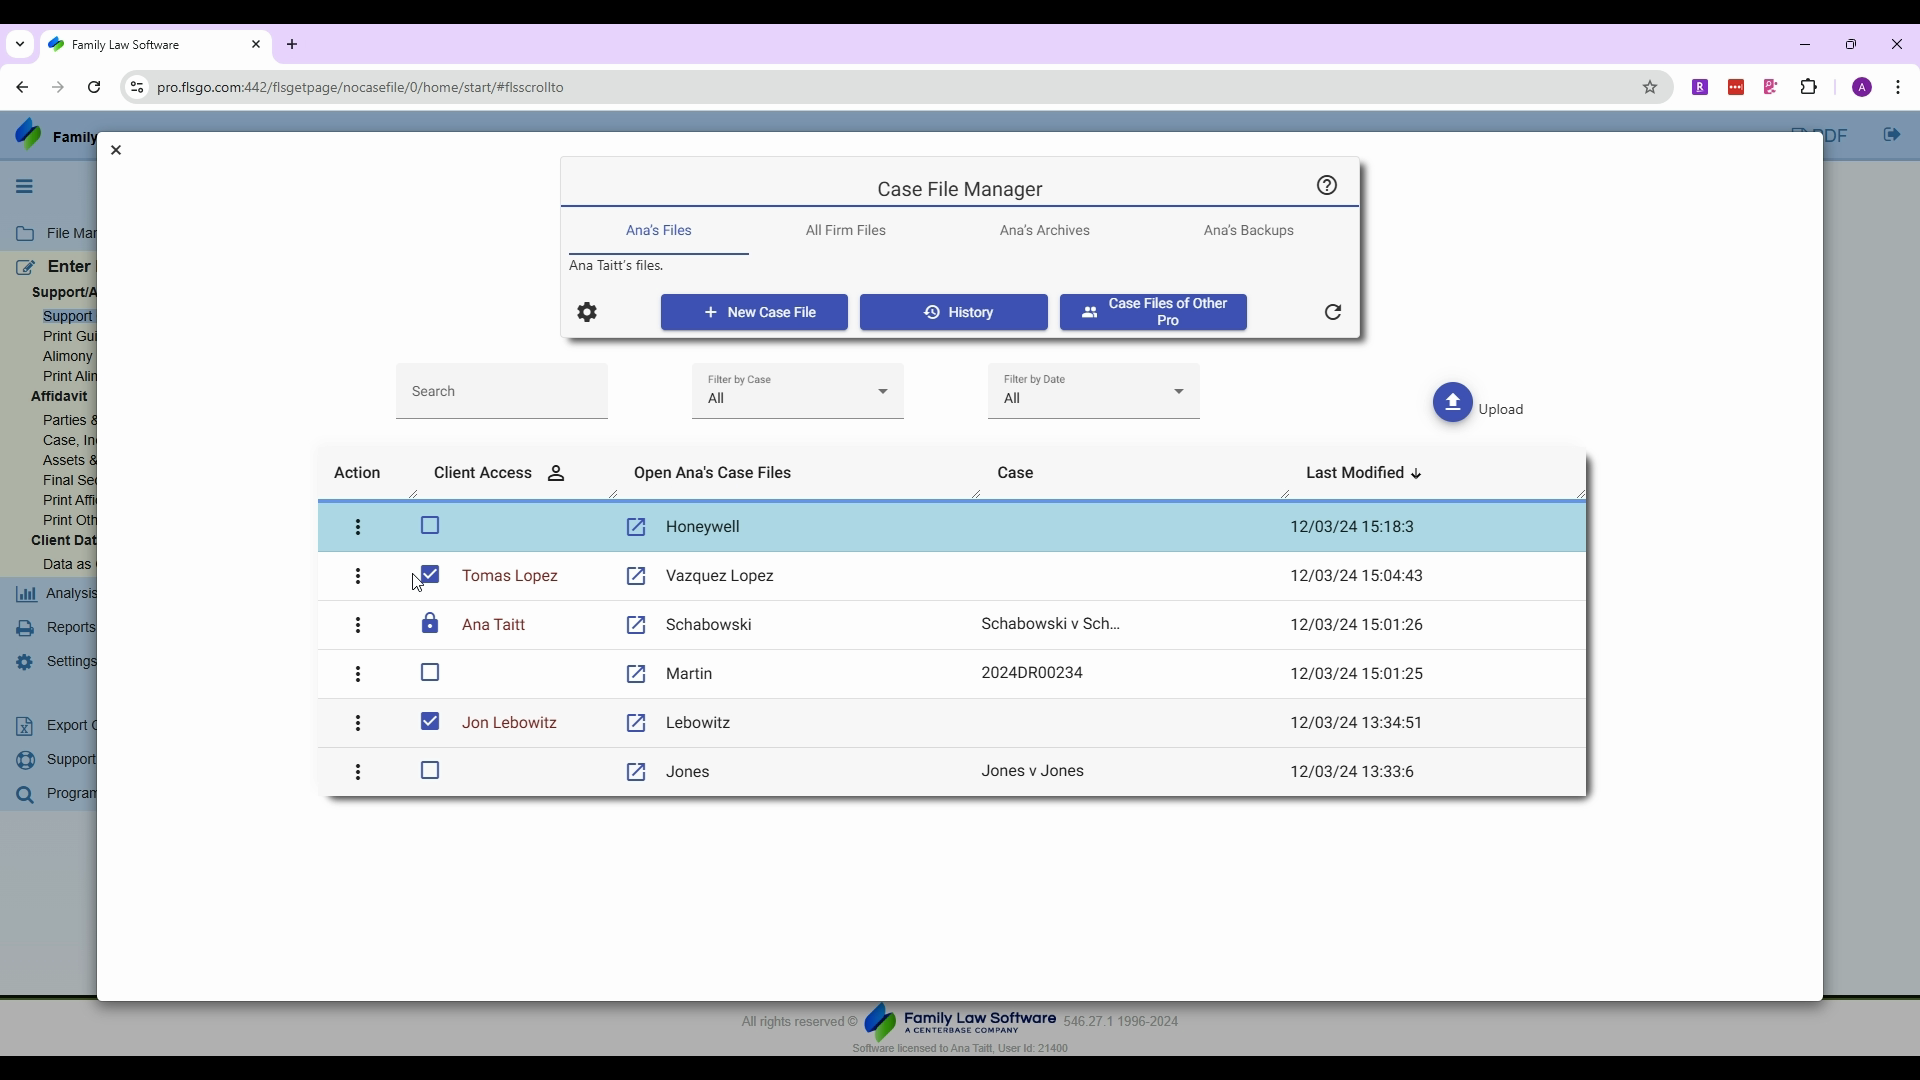
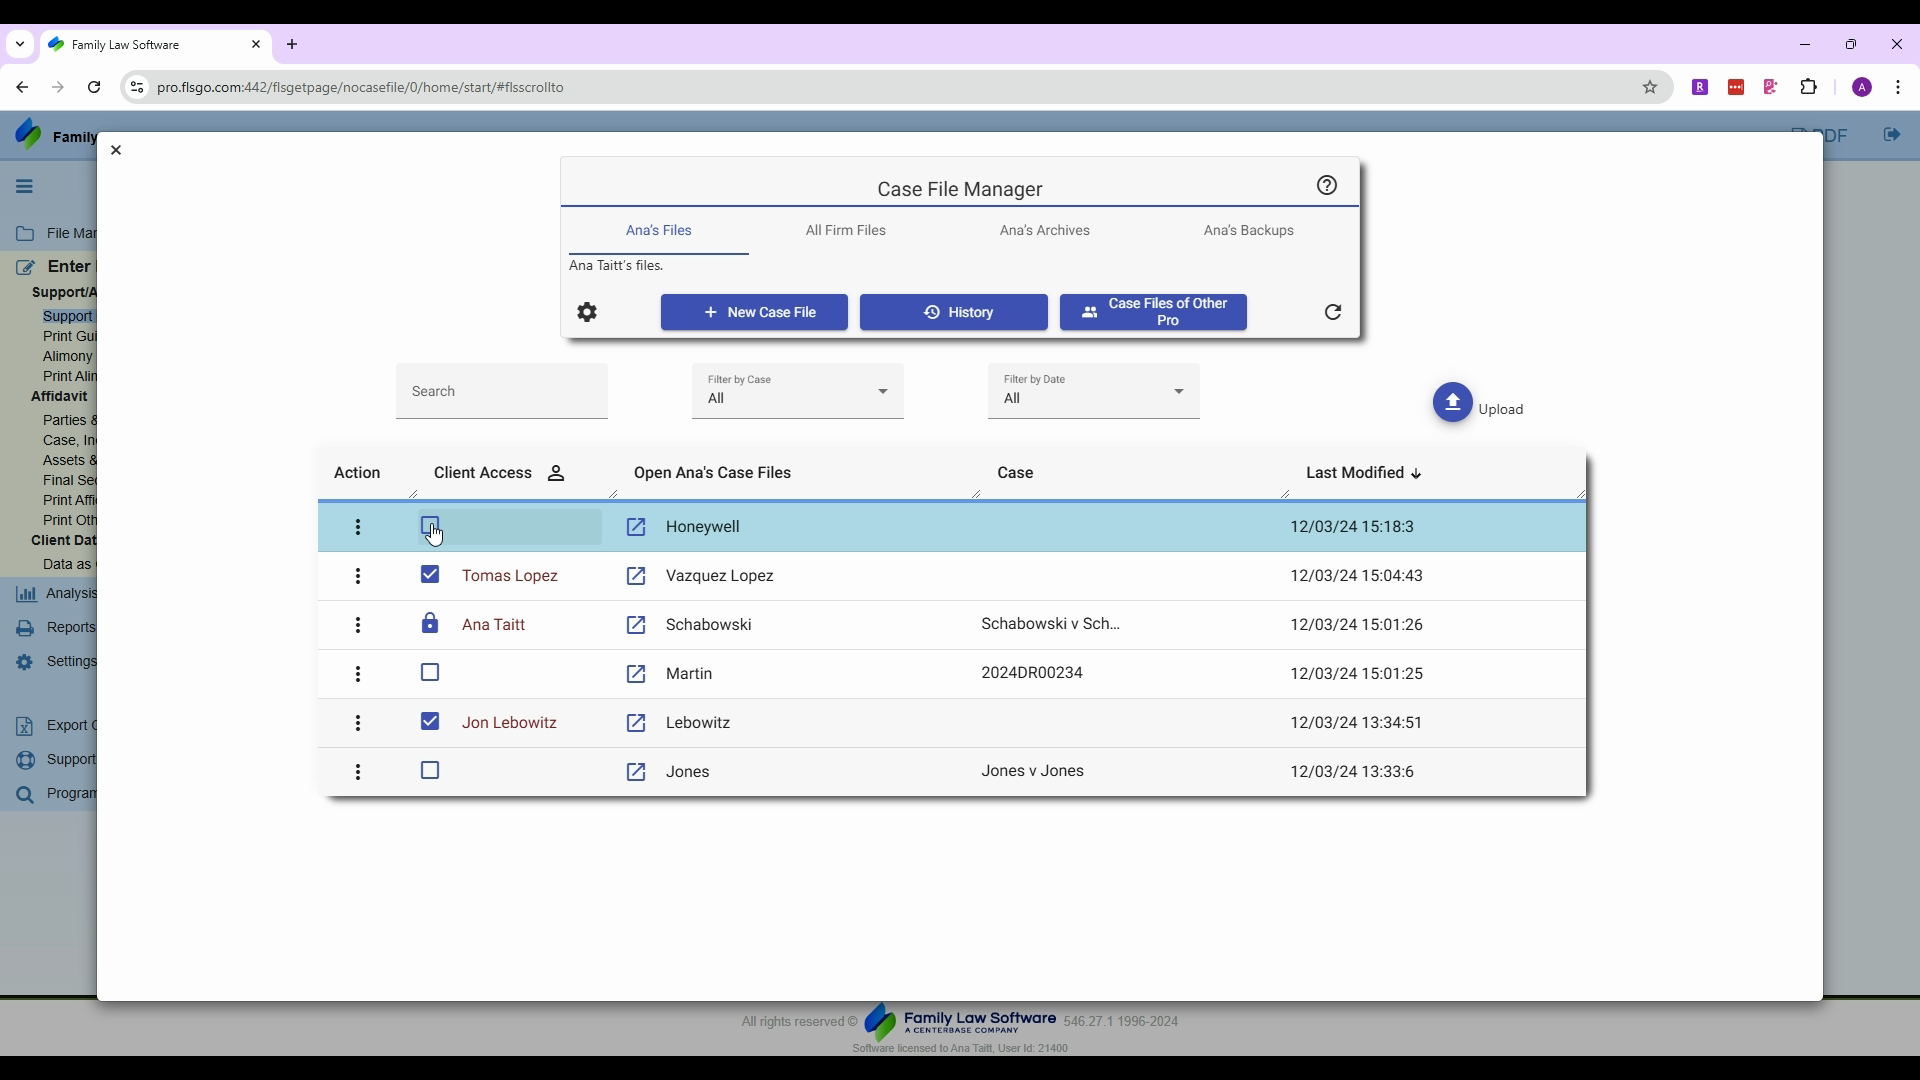
Step 3: When you create a new case file, it will appear in your bank of client files with a blank checkbox. You can choose to leave it blank or share it with a client by checking the box.
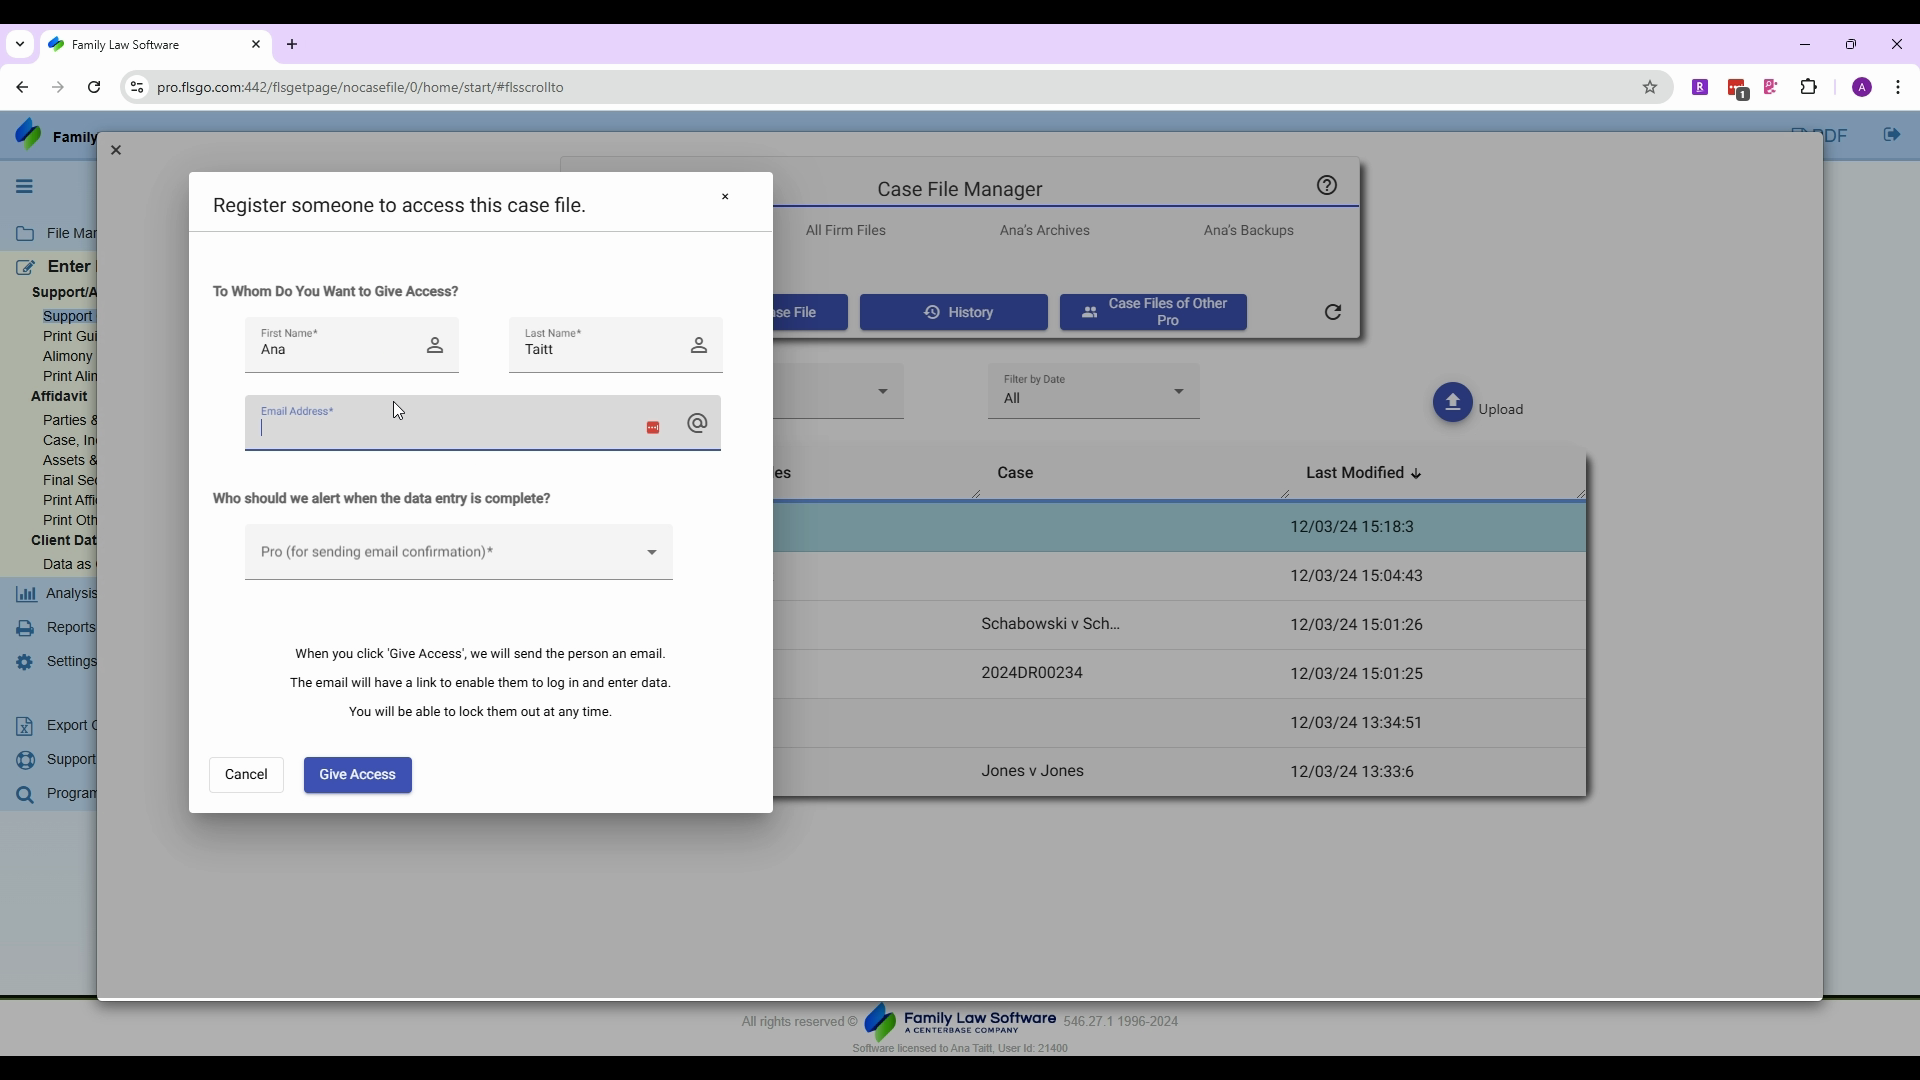
Step 4: When you check the box to share a file, a registration pop-up will appear. Enter the name and email address of the person you want to give access to. You'll also see a dropdown of professionals in your office who will be alerted when the file is ready. Click give access.
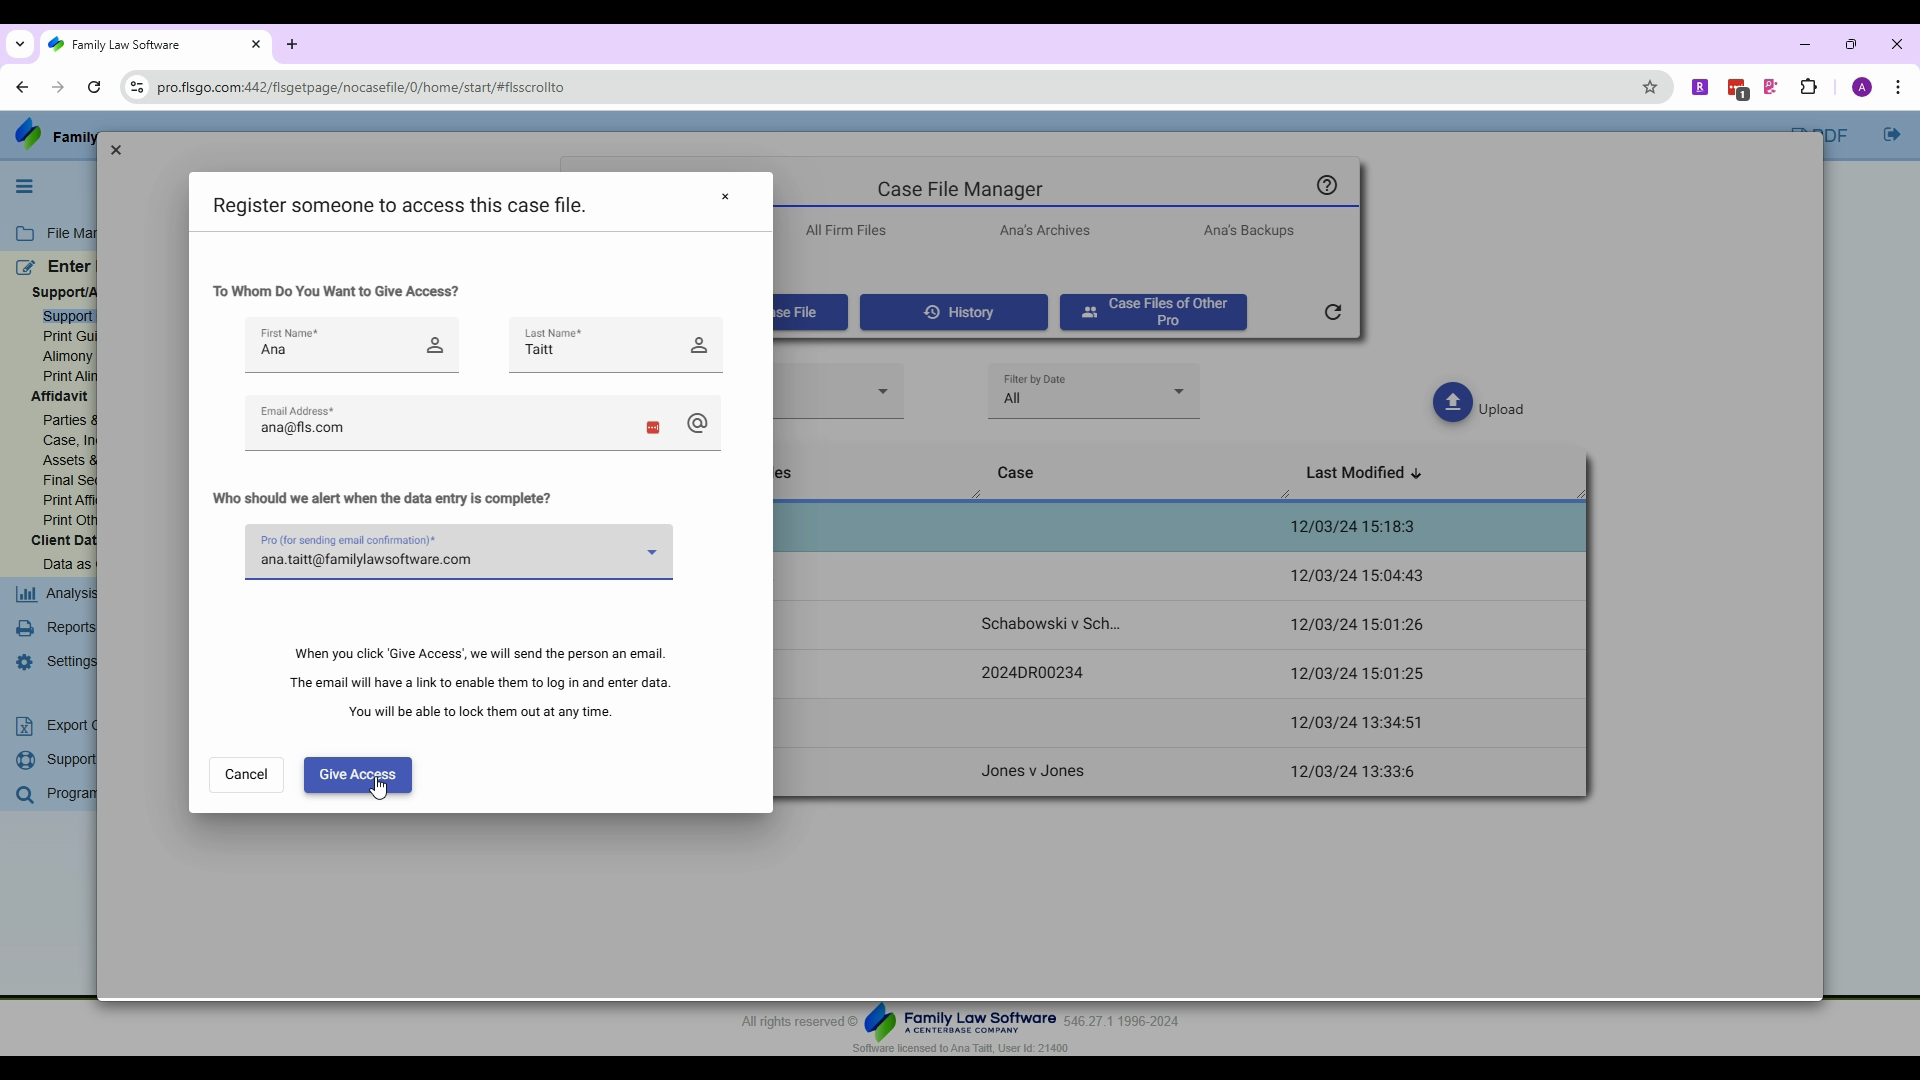
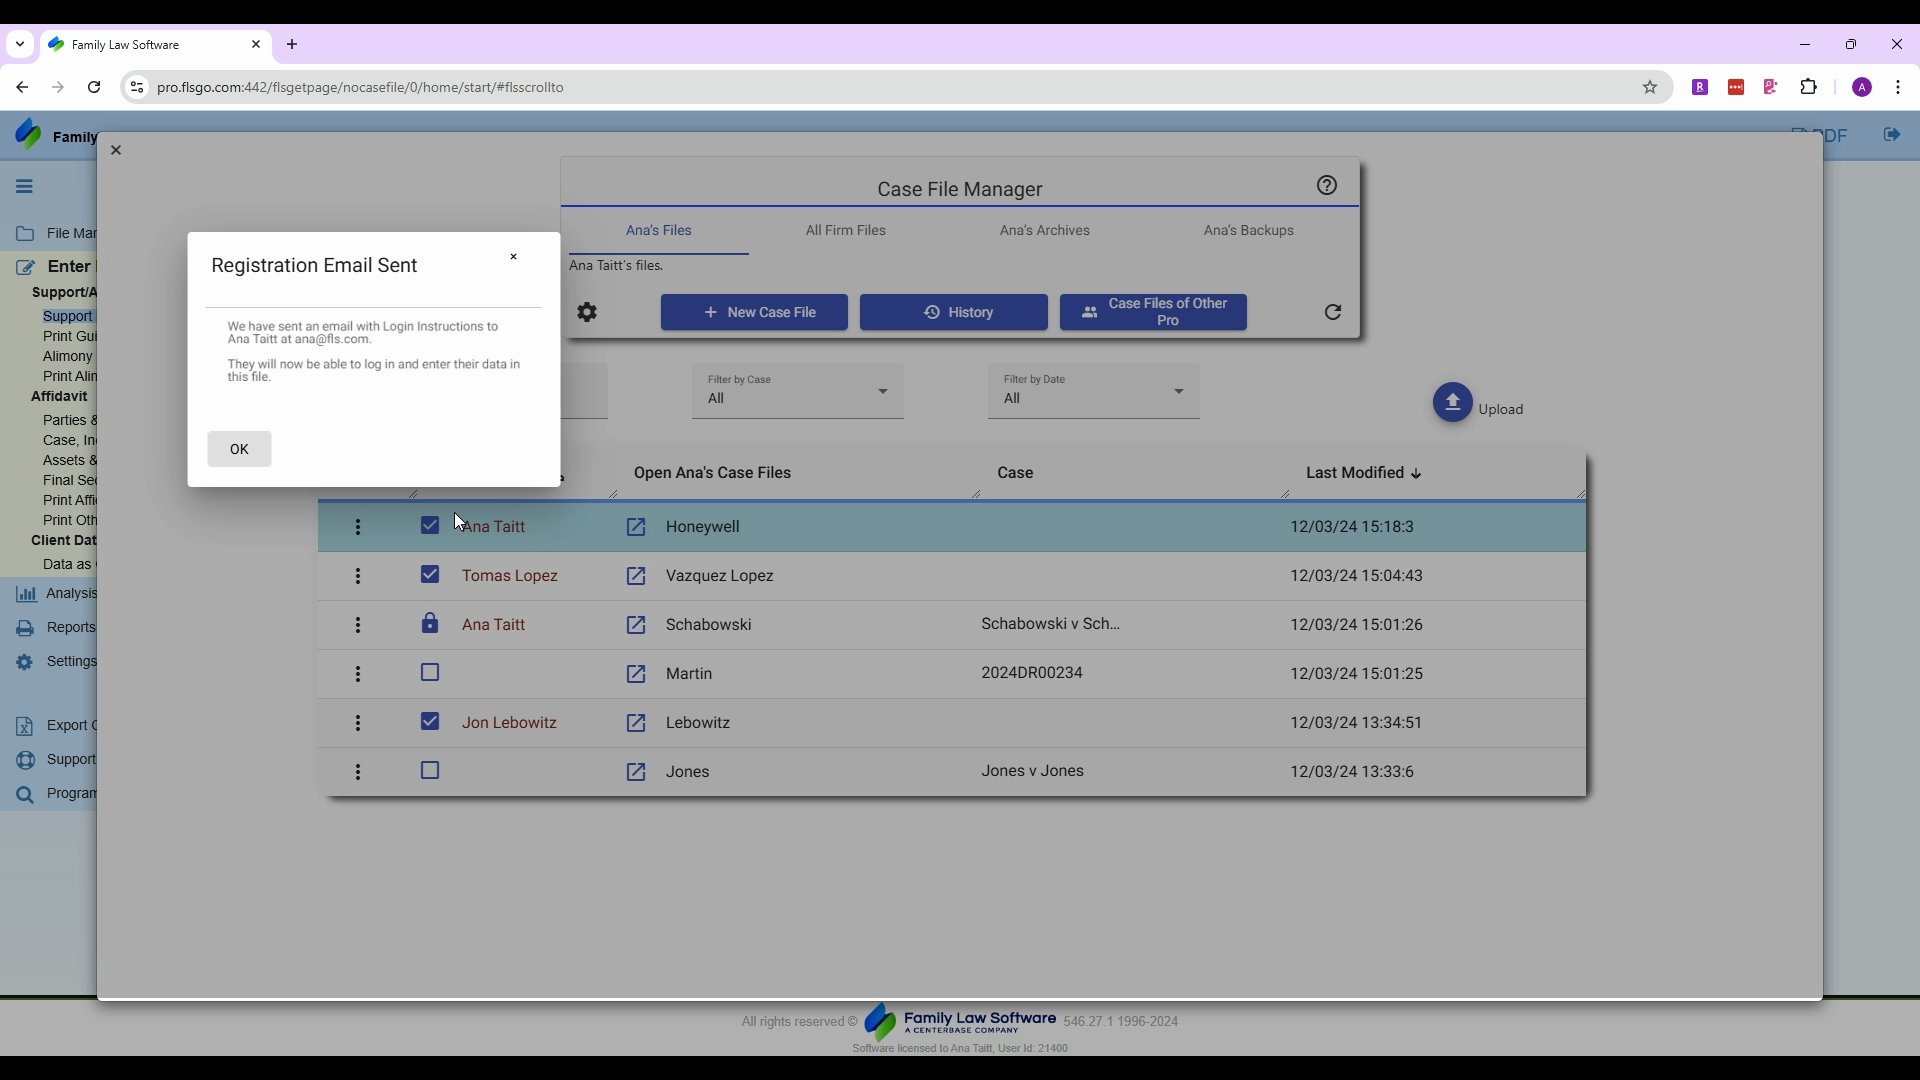
Step 5: After giving access, a checkbox will appear next to the file and a registration confirmation will pop up. Click okay.
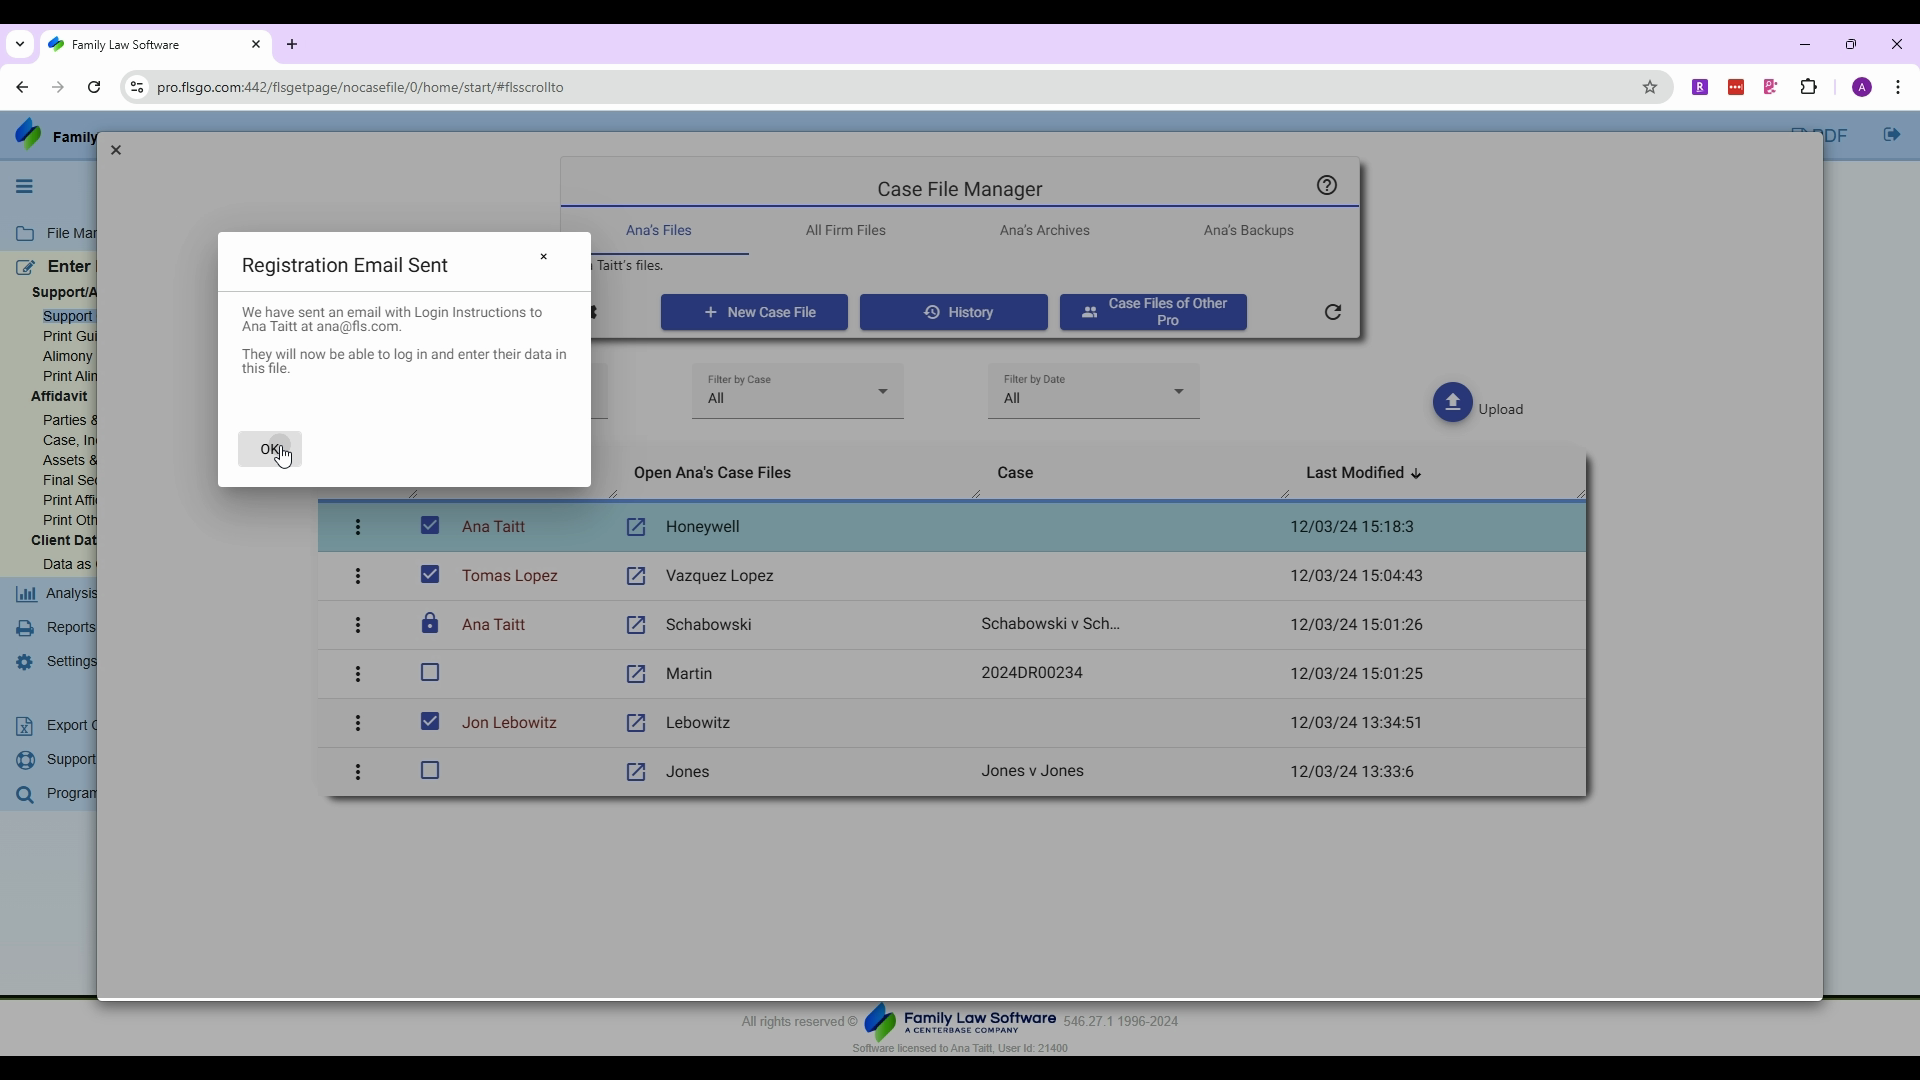
Step 6: If a client wants access again, or didn't receive the registration, or you want to resend the registration, click the action next to the file and then click resend client email.
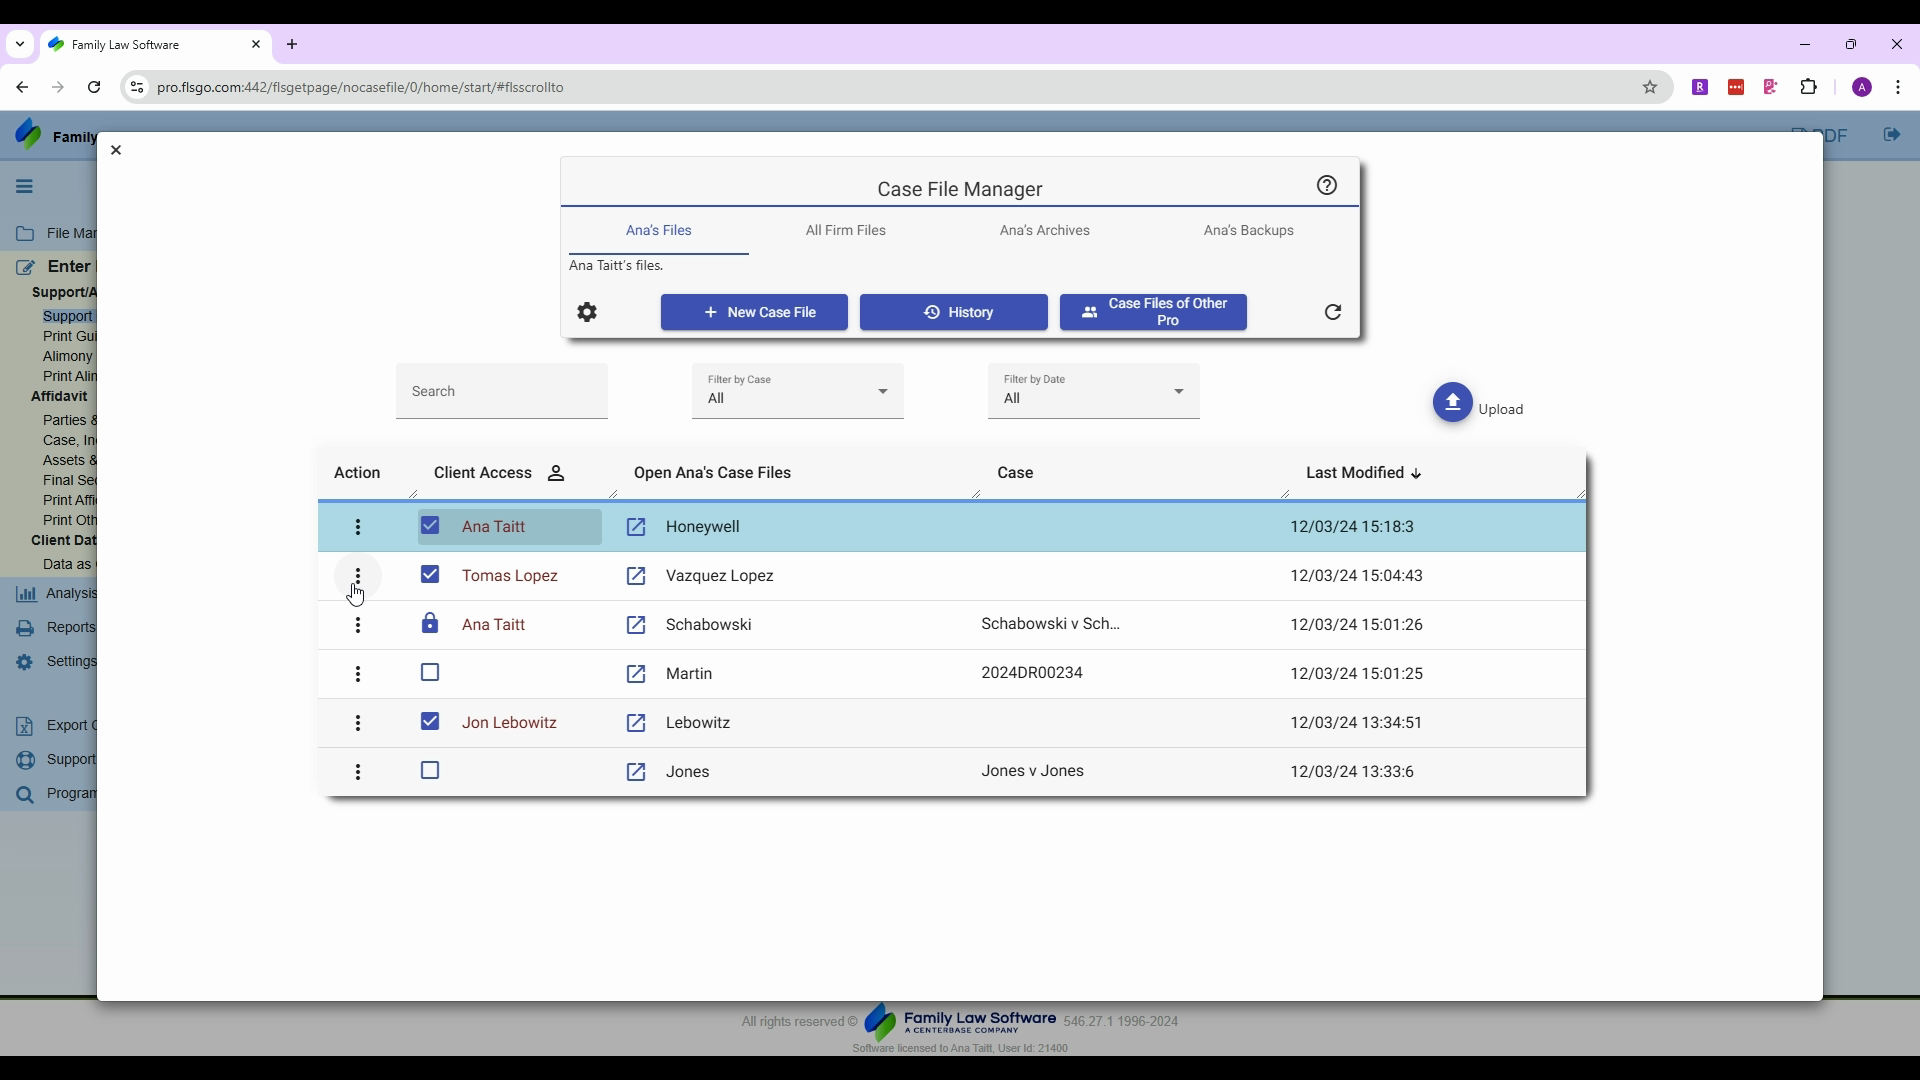
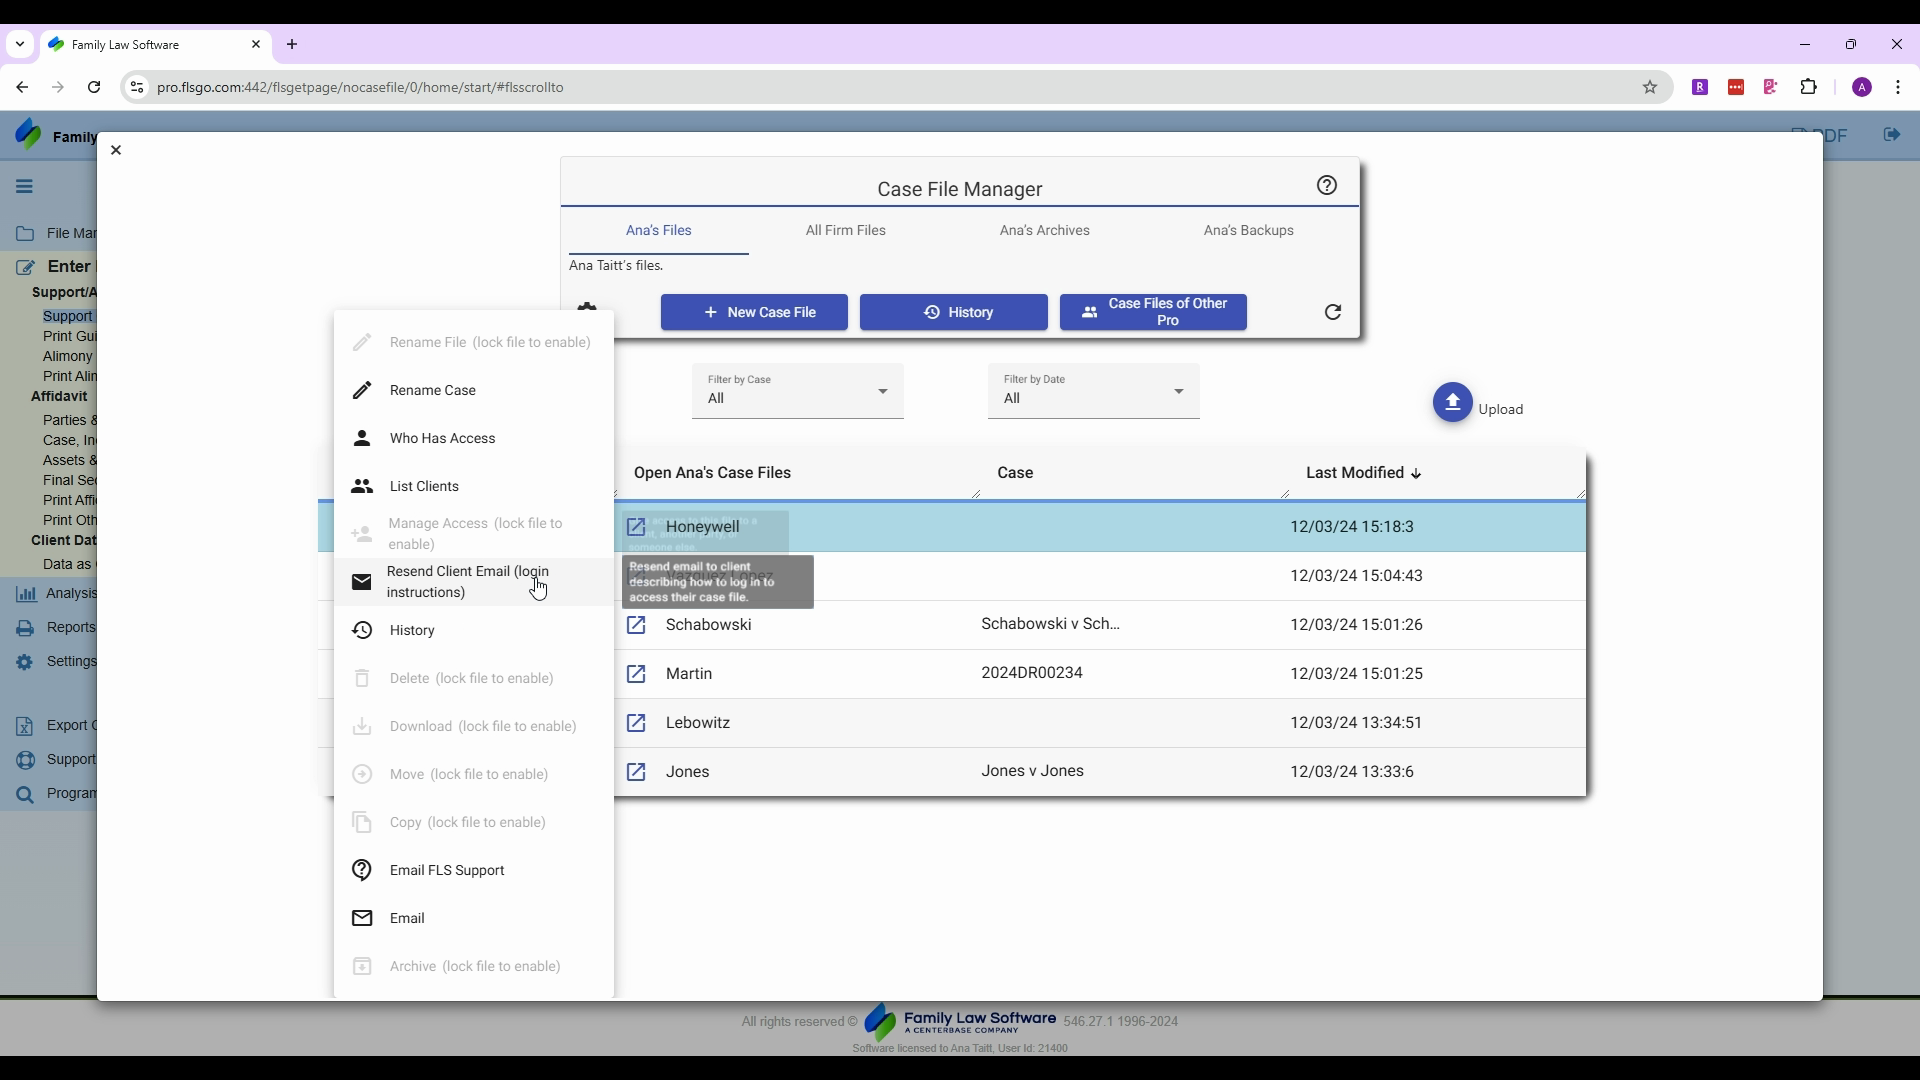
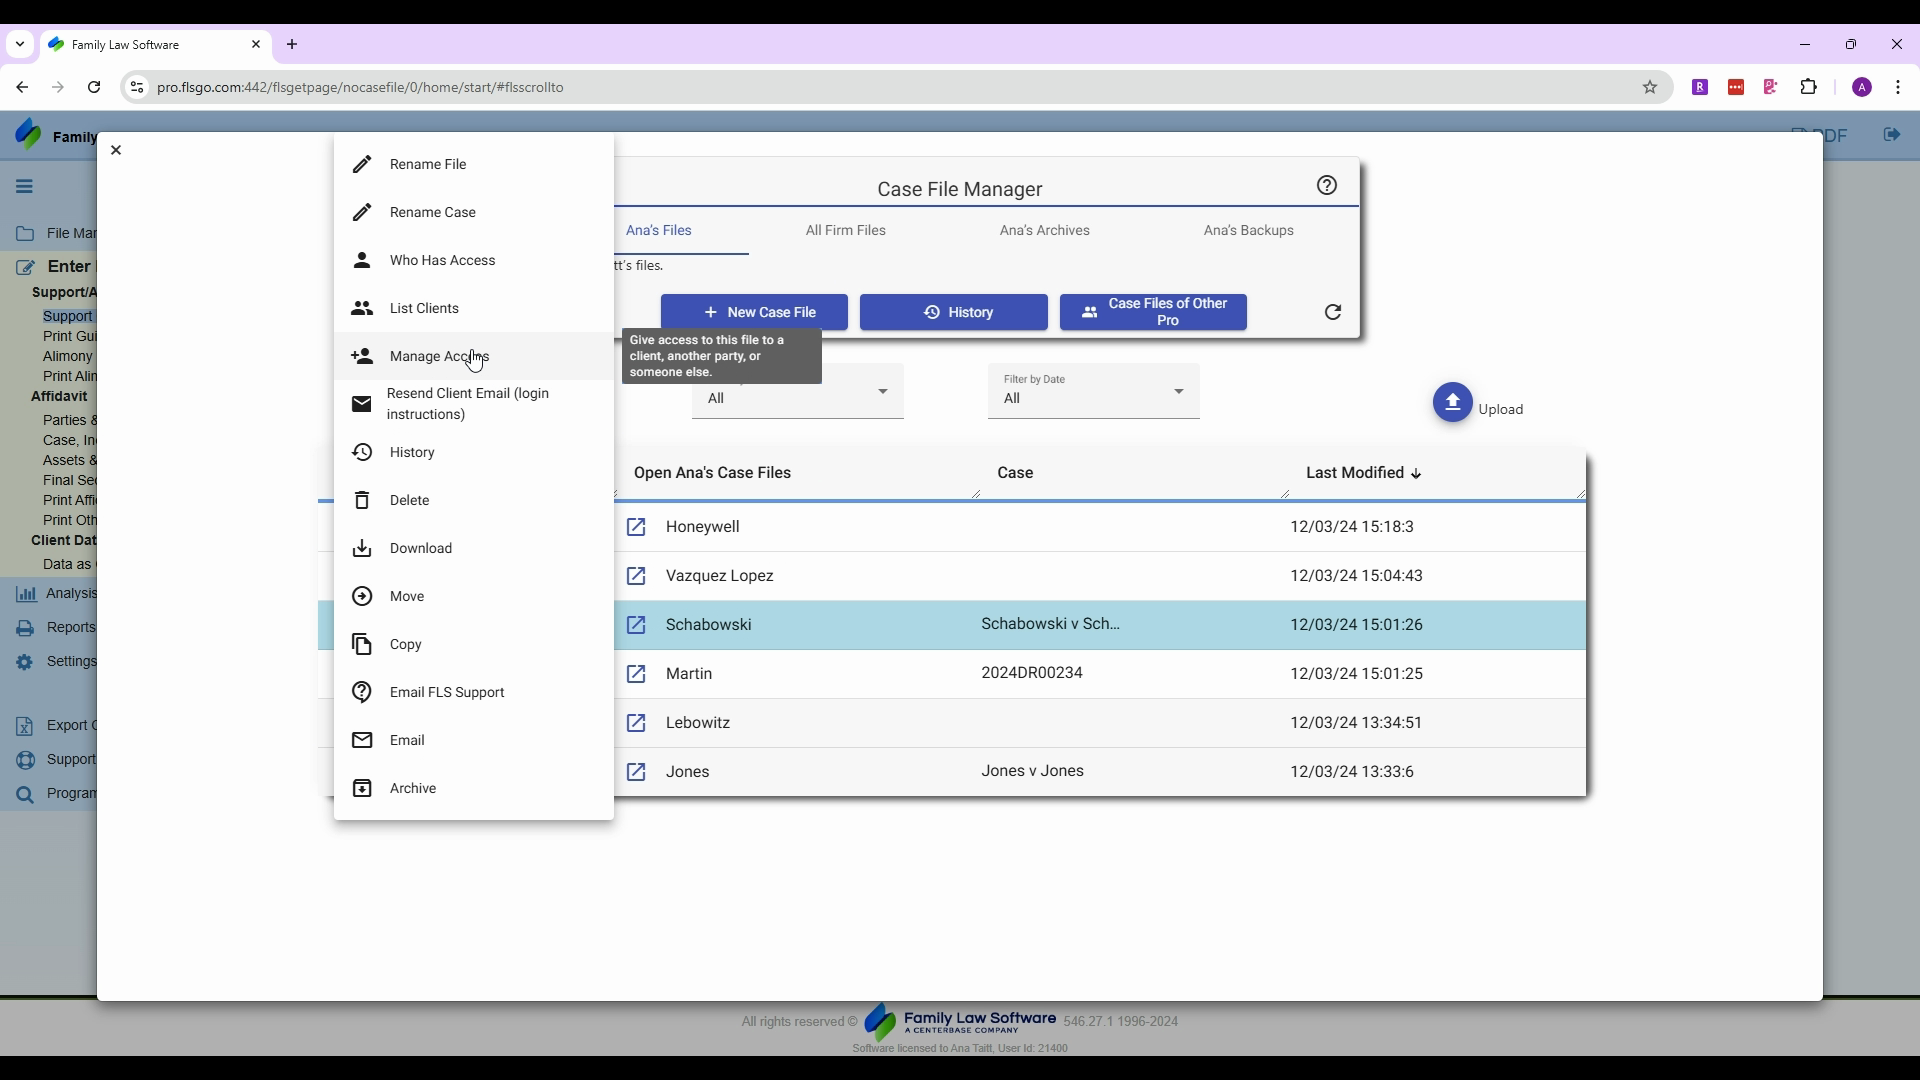
Step 7: You can view the file's history to see when users in your office or the client have logged in. For locked files, under action items, you'll see a manage access icon.
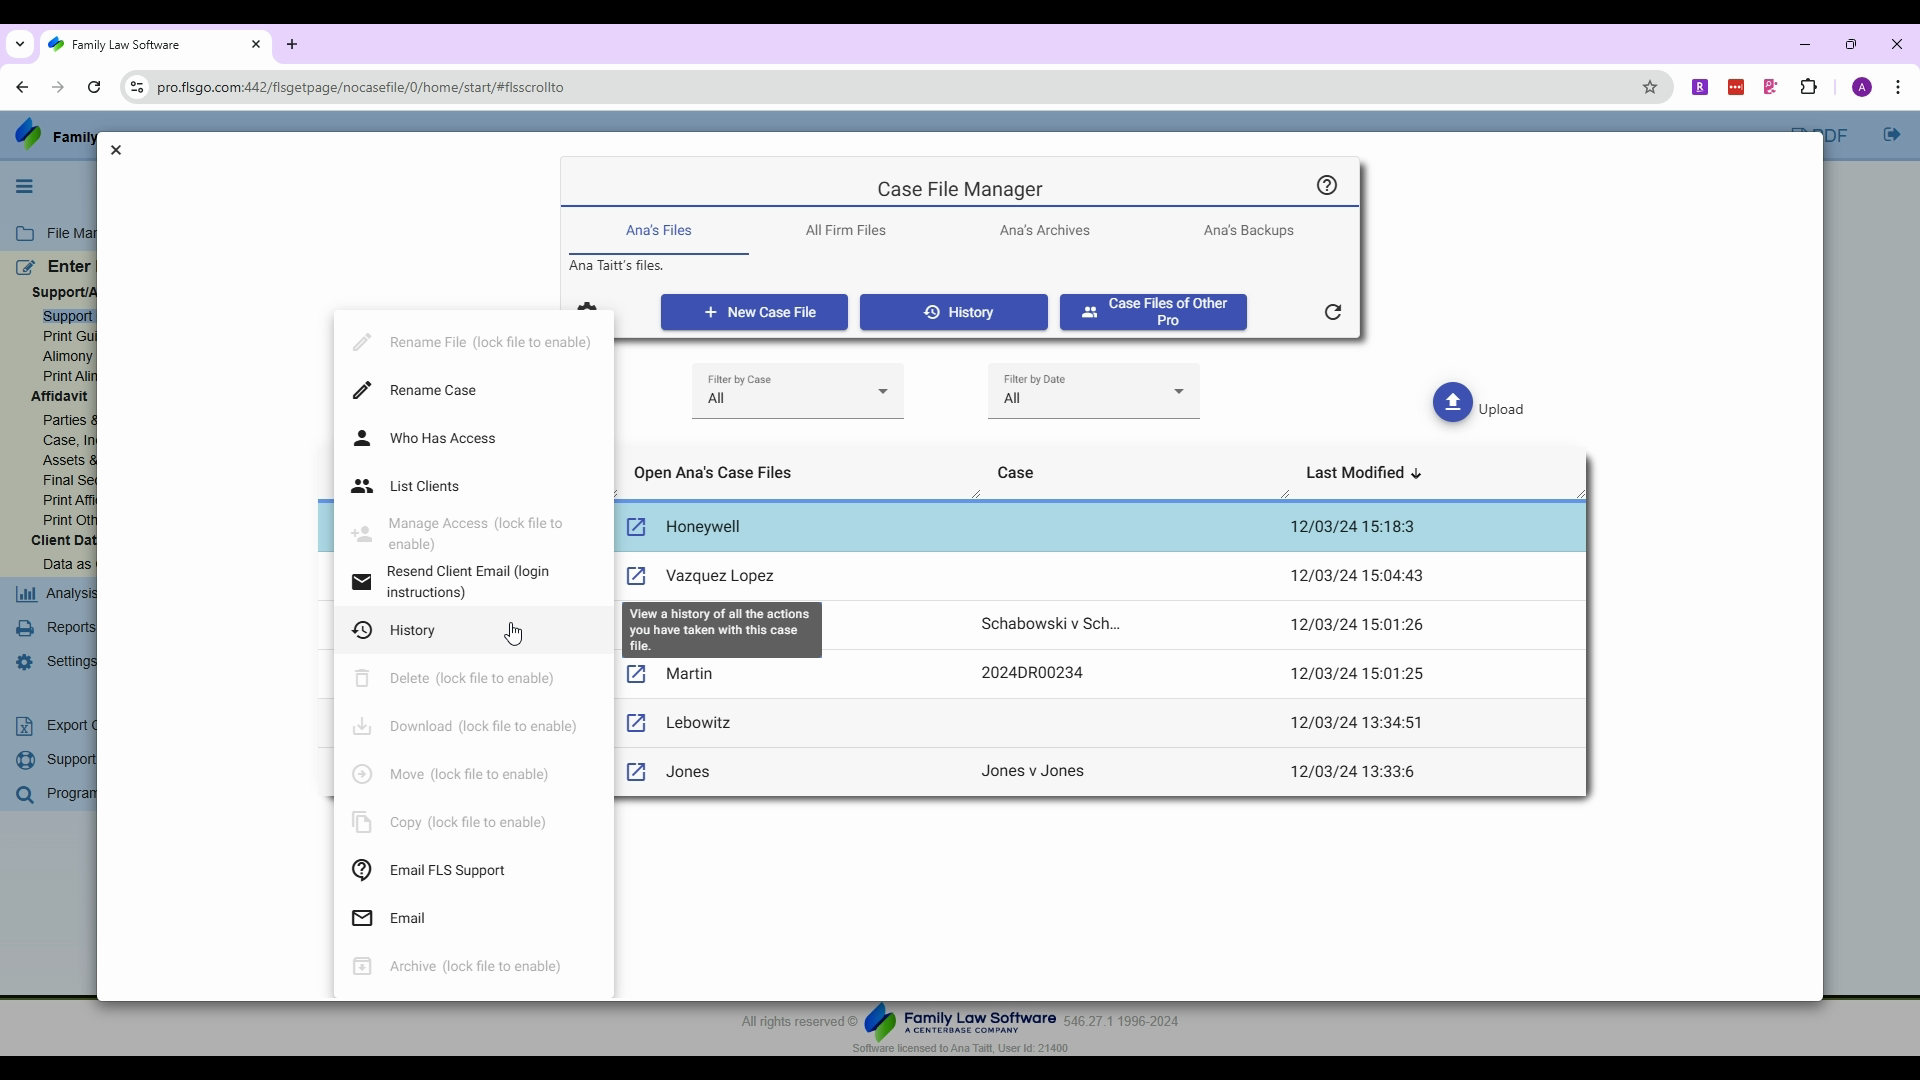
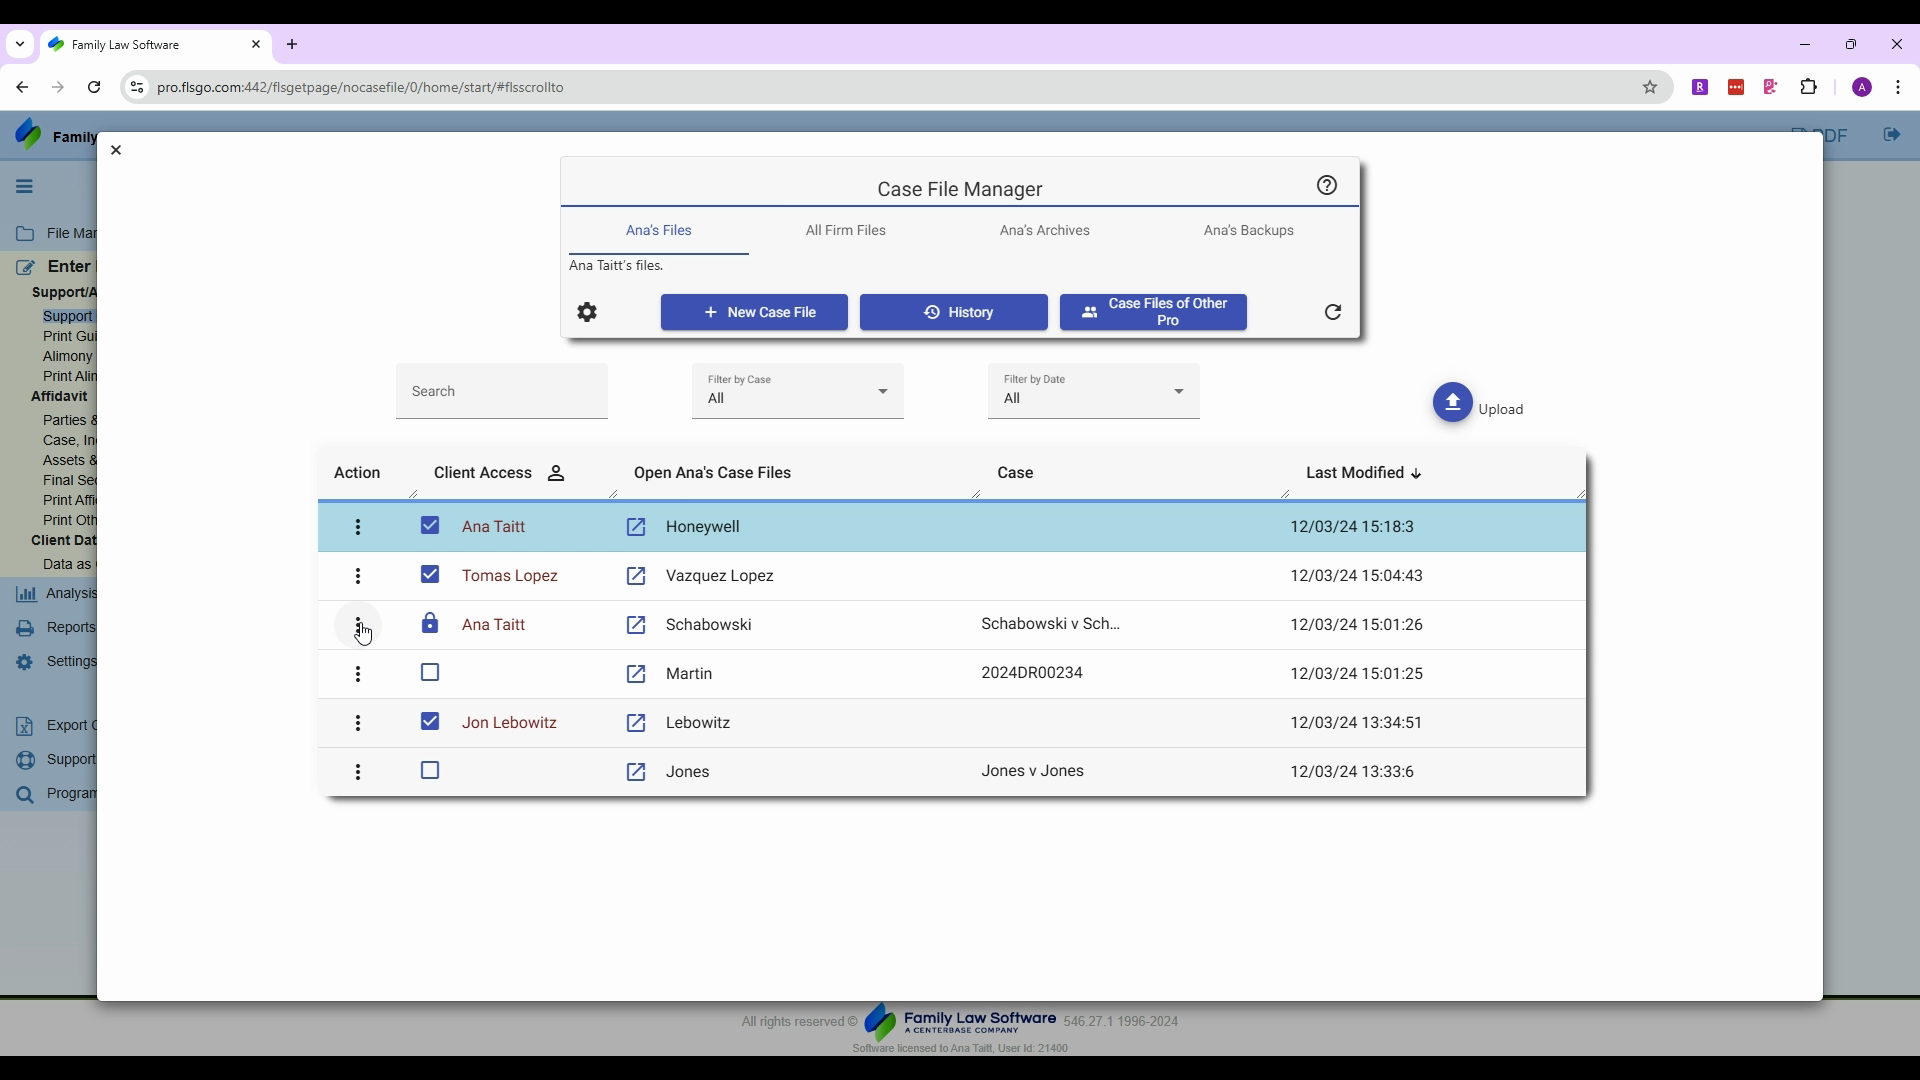
Step 8: Click manage access to unregister a client completely or register a different person. Remember, only one person can have access for client data entry. To lock out a client, click the checkbox and a padlock will appear.
We hope you find these new features helpful. Thank you for reading.
Created on
Did you find this article helpful?